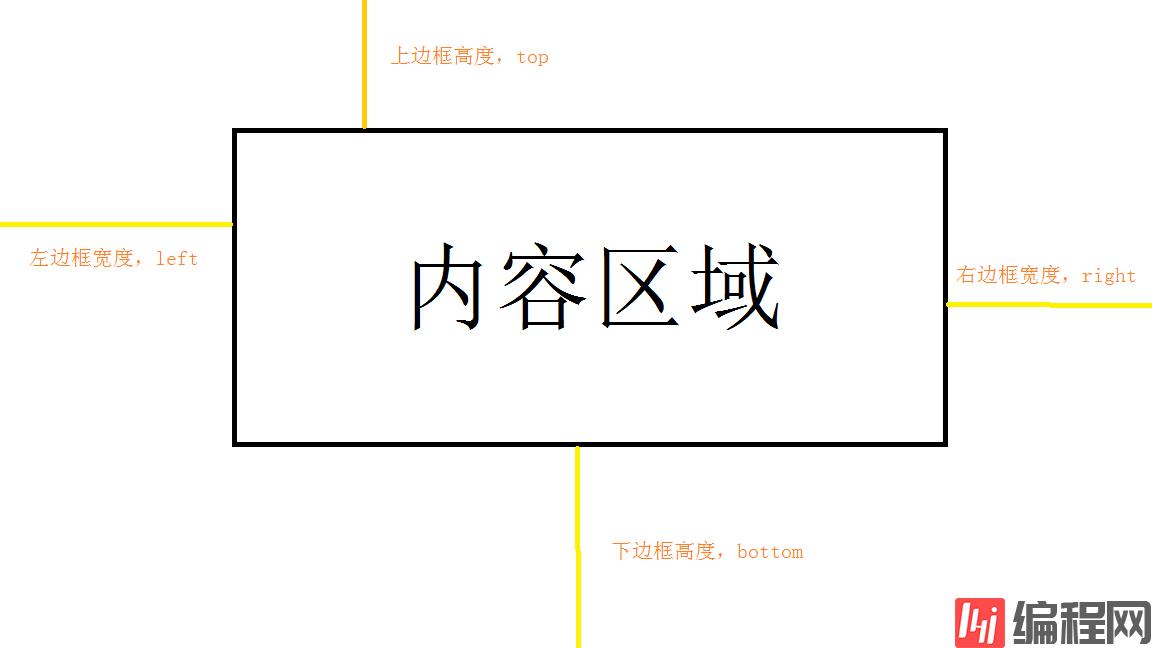
本文实例讲述了Android开发实现去除bitmap无用白色边框的方法。分享给大家供大家参考,具体如下:
图示
如下图所示,之前介绍过Android Bitmap的用法,这里提供的工具类作用是,去除内容区域以外的白色边框。

代码
import android.graphics.Bitmap;public class BitmapDeleteNoUseSpaceUtil { private static Bitmap getGrayImg(int imgTheWidth, int imgTheHeight, int[] imgThePixels) { int alpha = 0xFF << 24; //设置透明度 for (int i = 0; i < imgTheHeight; i++) { for (int j = 0; j < imgTheWidth; j++) { int grey = imgThePixels[imgTheWidth * i + j]; int red = ((grey & 0x00FF0000) >> 16); //获取红色灰度值 int green = ((grey & 0x0000FF00) >> 8); //获取绿色灰度值 int blue = (grey & 0x000000FF); //获取蓝色灰度值 grey = (int) ((float) red * 0.3 + (float) green * 0.59 + (float) blue * 0.11); grey = alpha | (grey << 16) | (grey << 8) | grey; //添加透明度 imgThePixels[imgTheWidth * i + j] = grey; //更改像素色值 } } Bitmap result = Bitmap.createBitmap(imgTheWidth, imgTheHeight, Bitmap.Config.RGB_565); result.setPixels(imgThePixels, 0, imgTheWidth, 0, 0, imgTheWidth, imgTheHeight); return result; } public static Bitmap deleteNoUseWhiteSpace(Bitmap originBitmap) { int[] imgThePixels = new int[originBitmap.getWidth() * originBitmap.getHeight()]; originBitmap.getPixels( imgThePixels, 0, originBitmap.getWidth(), 0, 0, originBitmap.getWidth(), originBitmap.getHeight()); // 灰度化 bitmap Bitmap bitmap = getGrayImg( originBitmap.getWidth(), originBitmap.getHeight(), imgThePixels); int top = 0; // 上边框白色高度 int left = 0; // 左边框白色高度 int right = 0; // 右边框白色高度 int bottom = 0; // 底边框白色高度 for (int h = 0; h < bitmap.getHeight(); h++) { boolean holdBlackPix = false; for (int w = 0; w < bitmap.getWidth(); w++) { if (bitmap.getPixel(w, h) != -1) { // -1 是白色 holdBlackPix = true; // 如果不是-1 则是其他颜色 break; } } if (holdBlackPix) { break; } top++; } for (int w = 0; w < bitmap.getWidth(); w++) { boolean holdBlackPix = false; for (int h = 0; h < bitmap.getHeight(); h++) { if (bitmap.getPixel(w, h) != -1) { holdBlackPix = true; break; } } if (holdBlackPix) { break; } left++; } for (int w = bitmap.getWidth() - 1; w >= 0; w--) { boolean holdBlackPix = false; for (int h = 0; h < bitmap.getHeight(); h++) { if (bitmap.getPixel(w, h) != -1) { holdBlackPix = true; break; } } if (holdBlackPix) { break; } right++; } for (int h = bitmap.getHeight() - 1; h >= 0; h--) { boolean holdBlackPix = false; for (int w = 0; w < bitmap.getWidth(); w++) { if (bitmap.getPixel(w, h) != -1) { holdBlackPix = true; break; } } if (holdBlackPix) { break; } bottom++; } // 获取内容区域的宽高 int cropHeight = bitmap.getHeight() - bottom - top; int cropWidth = bitmap.getWidth() - left - right; // 获取内容区域的像素点 int[] newPix = new int[cropWidth * cropHeight]; int i = 0; for (int h = top; h < top + cropHeight; h++) { for (int w = left; w < left + cropWidth; w++) { newPix[i++] = bitmap.getPixel(w, h); } } // 创建切割后的 bitmap, 针对彩色图,把 newPix 替换为 originBitmap 的 pixs return Bitmap.createBitmap(newPix, cropWidth, cropHeight, Bitmap.Config.ARGB_8888); }}免责声明:
① 本站未注明“稿件来源”的信息均来自网络整理。其文字、图片和音视频稿件的所属权归原作者所有。本站收集整理出于非商业性的教育和科研之目的,并不意味着本站赞同其观点或证实其内容的真实性。仅作为临时的测试数据,供内部测试之用。本站并未授权任何人以任何方式主动获取本站任何信息。
② 本站未注明“稿件来源”的临时测试数据将在测试完成后最终做删除处理。有问题或投稿请发送至: 邮箱/279061341@qq.com QQ/279061341
软考中级精品资料免费领
历年真题答案解析
备考技巧名师总结
高频考点精准押题
- 资料下载
- 历年真题
193.9 KB下载数265
191.63 KB下载数245
143.91 KB下载数1148
183.71 KB下载数642
644.84 KB下载数2756
相关文章
发现更多好内容猜你喜欢
AI推送时光机Android开发实现去除bitmap无用白色边框的方法示例
后端开发2023-05-30
咦!没有更多了?去看看其它编程学习网 内容吧


