这篇文章主要介绍“Android怎么自定义View实现简易画板功能”的相关知识,小编通过实际案例向大家展示操作过程,操作方法简单快捷,实用性强,希望这篇“Android怎么自定义View实现简易画板功能”文章能帮助大家解决问题。
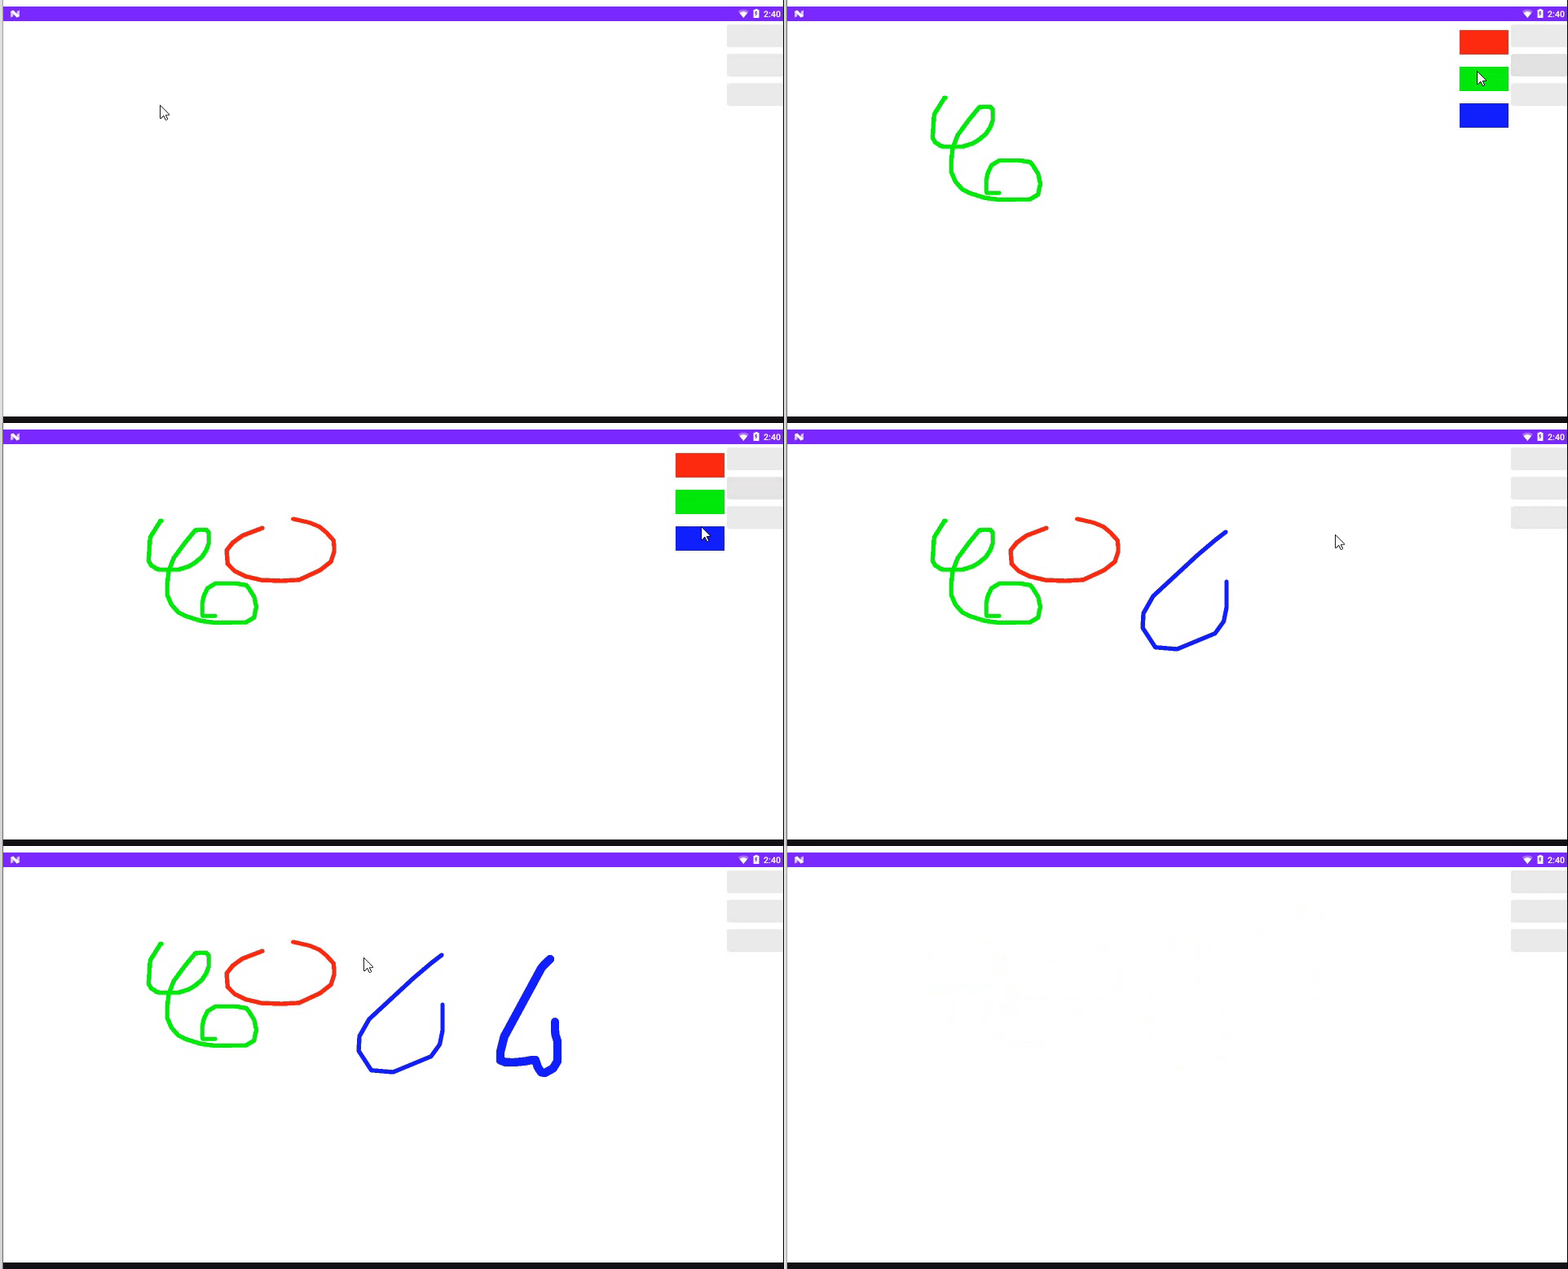
自定义VIew实现简易画板效果,功能包括清空、选择颜色,选择大小,效果如下

画板布局:
<?xml version="1.0" encoding="utf-8"?><LinearLayout xmlns:android="http://schemas.android.com/apk/res/android" xmlns:tools="http://schemas.android.com/tools" android:layout_width="match_parent" android:layout_height="match_parent" android:gravity="center" android:orientation="vertical" tools:context=".MainActivity"> <!-- 这是一个自定义组合控件,包含涂鸦板及右边三个按钮 --> <com.android.mytest.GraffitiBroadLayout android:layout_width="match_parent" android:layout_height="match_parent" /></LinearLayout>自定义view GraffitiBroadLayout 布局文件 view_graffiti.xml:
<FrameLayout xmlns:android="http://schemas.android.com/apk/res/android" android:layout_width="match_parent" android:layout_height="match_parent" android:orientation="horizontal" android:baselineAligned="false"> <!-- 自定义涂鸦板View --> <com.android.mytest.GraffitiView android:id="@+id/graffiti_view" android:layout_width="match_parent" android:layout_height="match_parent" android:orientation="horizontal" /> <androidx.recyclerview.widget.RecyclerView android:id="@+id/recycler_view" android:visibility="gone" android:layout_gravity="right" android:layout_marginRight="100dp" android:layout_width="80dp" android:layout_height="wrap_content"/> <!-- 右侧三个按钮 清空、颜色、粗细 --> <LinearLayout android:layout_gravity="right" android:orientation="vertical" android:layout_width="100dp" android:layout_height="match_parent"> <Button android:id="@+id/clear_all" android:layout_width="match_parent" android:layout_height="wrap_content"/> <Button android:id="@+id/select_color" android:layout_width="match_parent" android:layout_height="wrap_content"/> <Button android:id="@+id/select_size" android:layout_width="match_parent" android:layout_height="wrap_content"/> </LinearLayout></FrameLayout>画板布局中包括一个 自定义涂鸦view,recyclerView用于显示选择颜色、大小,三个按钮,分别是:
清空、选择颜色、选择大小
// 继承LinearLayout public class GraffitiBroadLayout extends LinearLayout { private final int[] colors = {R.color.red,R.color.green,R.color.blue};// 颜色数组 private final int[] sizes = {5,10,15,20};// 画笔size数组 private Context mContext; private View mView; private GraffitiView mGraffitiView; private RecyclerView mRecyclerView; public GraffitiBroadLayout(Context context) { super(context); } public GraffitiBroadLayout(Context context, @Nullable AttributeSet attrs) { super(context, attrs); mContext = context; // 获取布局View mView = LayoutInflater.from(context).inflate(R.layout.view_graffiti, this,true); initView();// 初始化并设置点击事件 } private void initView() { Button clearAllBtn = mView.findViewById(R.id.clear_all); Button selectColorBtn = mView.findViewById(R.id.select_color); Button selectSizeBtn = mView.findViewById(R.id.select_size); mGraffitiView = mView.findViewById(R.id.graffiti_view); mRecyclerView = mView.findViewById(R.id.recycler_view); mRecyclerView.setLayoutManager(new LinearLayoutManager(mContext)); // 点击清空 画板 clearAllBtn.setOnClickListener(v -> mGraffitiView.clearAllPath()); // 选择画笔颜色 selectColorBtn.setOnClickListener(v -> { GraffitiAdapter adapter = new GraffitiAdapter(mContext,colors,1); mRecyclerView.setAdapter(adapter); mRecyclerView.setVisibility(VISIBLE); }); // 选择画笔大小 selectSizeBtn.setOnClickListener(v -> { GraffitiAdapter adapter = new GraffitiAdapter(mContext,sizes,2); mRecyclerView.setAdapter(adapter); mRecyclerView.setVisibility(VISIBLE); }); } // 自定义adapter class GraffitiAdapter extends RecyclerView.Adapter<GraffitiViewHolder>{ Context mContext; int[] cs; int type;// 用于判断显示颜色 还是 选择大小 public GraffitiAdapter(Context mContext, int[] cs,int type) { this.mContext = mContext; this.cs = cs; this.type = type; } @NonNull @Override public GraffitiViewHolder onCreateViewHolder(@NonNull ViewGroup parent, int viewType) { // 获取 item 布局 View view = LayoutInflater.from(mContext).inflate(R.layout.item_recycler_graffiti,parent,false); return new GraffitiViewHolder(view); } @Override public void onBindViewHolder(@NonNull GraffitiViewHolder holder, int position) { if(type == 1){// 颜色 holder.view.setBackgroundResource(cs[position]); holder.click.setOnClickListener(v -> { // 设置画笔颜色 mGraffitiView.setPaintColor(cs[position]); mRecyclerView.setVisibility(GONE); }); }else if(type == 2){// size ViewGroup.LayoutParams lp = holder.view.getLayoutParams(); lp.height = sizes[position]*2; holder.view.setLayoutParams(lp); holder.view.setBackgroundResource(R.color.black); holder.click.setOnClickListener(v -> { // 设置画笔size mGraffitiView.setPaintSize(sizes[position]); mRecyclerView.setVisibility(GONE); }); } } @Override public int getItemCount() { return cs.length; } } static class GraffitiViewHolder extends RecyclerView.ViewHolder{ View view; LinearLayout click; public GraffitiViewHolder(@NonNull View itemView) { super(itemView); view = itemView.findViewById(R.id.item_view); click = itemView.findViewById(R.id.click_view); } }}item_recycler_graffiti.xml 布局文件
<LinearLayout xmlns:android="http://schemas.android.com/apk/res/android" xmlns:tools="http://schemas.android.com/tools" android:layout_width="match_parent" android:layout_marginTop="10dp" android:layout_height="50dp" android:gravity="center"> <LinearLayout android:id="@+id/click_view" android:gravity="center" android:layout_width="match_parent" android:layout_height="match_parent" tools:ignore="UselessParent"> <View android:id="@+id/item_view" android:layout_width="match_parent" android:layout_height="40dp"/> </LinearLayout></LinearLayout>自定义涂鸦View:
public class GraffitiView extends View { private final Context mContext; private Canvas mCanvas;// private Bitmap mBitmap;// 用于保存绘制过的路径的 bitmap private Paint mPaint;// 画笔 private Path mPath;// 触摸时的路径 private int width,height; public GraffitiView(Context context) { this(context,null); } public GraffitiView(Context context, @Nullable AttributeSet attrs) { super(context, attrs); mContext = context; init(); } private void init() { // 初始化 画笔 mPaint = new Paint(); mPaint.setColor(mContext.getColor(R.color.green));//画笔颜色 mPaint.setAntiAlias(true);// 抗锯齿 mPaint.setDither(true);// 抖动处理 mPaint.setStrokeJoin(Paint.Join.ROUND);//画笔连接处 圆弧 mPaint.setStrokeCap(Paint.Cap.ROUND);//画笔拐弯处风格 圆弧 mPaint.setStyle(Paint.Style.STROKE);//画笔格式 mPaint.setStrokeWidth(10f);//画笔宽度 mPath = new Path(); } @Override protected void onMeasure(int widthMeasureSpec, int heightMeasureSpec) { super.onMeasure(widthMeasureSpec, heightMeasureSpec); width = getMeasuredWidth(); height = getMeasuredHeight(); if(mBitmap == null){ // 初始化 bitmap mBitmap = Bitmap.createBitmap(width,height, Bitmap.Config.ARGB_4444); } if(mCanvas == null){ mCanvas = new Canvas(mBitmap); } } @Override protected void onDraw(Canvas canvas) { super.onDraw(canvas); // 绘制路径 // 因为每次触摸都会生成一条新的路径,直接绘制会使原路径消失,因此 mCanvas.drawPath(mPath,mPaint);// 先将路径绘制到 bitmap 上,再绘制到当前画布中 canvas.drawBitmap(mBitmap, 0,0,mPaint);// 将bitmap绘制到当前画布中 } public void clearAllPath(){ mBitmap = Bitmap.createBitmap(width,height, Bitmap.Config.ARGB_4444); mCanvas = new Canvas(mBitmap); mPath.reset(); invalidate(); } public void setPaintColor(int resource){ mPaint.setColor(mContext.getColor(resource)); } public void setPaintSize(int size){ mPaint.setStrokeWidth(size); } @SuppressLint("ClickableViewAccessibility") @Override public boolean onTouchEvent(MotionEvent event) { int action = event.getAction(); float x = event.getX(); float y = event.getY(); switch (action){ case MotionEvent.ACTION_DOWN: mPath = new Path();// 每次触摸 生成一条新的路径 mPath.moveTo(x,y); break; case MotionEvent.ACTION_MOVE: mPath.lineTo(x,y); invalidate(); break; } return true; }}关于“Android怎么自定义View实现简易画板功能”的内容就介绍到这里了,感谢大家的阅读。如果想了解更多行业相关的知识,可以关注编程网行业资讯频道,小编每天都会为大家更新不同的知识点。


