今天小编给大家分享一下angular如何进行样式隔离的相关知识点,内容详细,逻辑清晰,相信大部分人都还太了解这方面的知识,所以分享这篇文章给大家参考一下,希望大家阅读完这篇文章后有所收获,下面我们一起来了解一下吧。
angular 以组件为基本单位。我们编写一个一个的组件,再将这些组件组合为一颗组件树。但是在开发的过程中,经常需要在父组件中覆盖子组件的样式。比如现在我们有一个parent 组件和child 组件,child 组件里面有一个span,span 的字体为红色。
如下所示:
//child.componet.html<span class="child-span">child span</span>//child.component.scss.child-span { color: red;}
如果现在,parent 组件想要child 组件中span 的内容变成绿色。可以使用如下的方式
//parent.component.scssapp-child { ::ng-deep { .child-span { color: green; } }}
在parent 组件中,使用angular 提供的::ng-deep 关键字进行样式的覆盖。
现在我们修改一下child 组件的内容,在span 外面加上一层div,毕竟现实中的组件肯定不会只有一层这么简单。
//child.componet.html<div class="child-div"> <span class="child-span">child span</span></div>//child.component.scss.child-div { .child-span { color: red; }}
这时候,我们会发现child 组件中span 的内容又变回了红色,之前parent 组件对其的覆盖并没有生效。
::ng-deep 为什么会失效呢?或者说,::ng-deep 会在什么时候有效?什么时候失效?更进一步说,angular 中组件和组件之间的样式隔离是怎么做到的呢?
css 选择器
css 中提供了元素选择器,id 选择器,class 选择器以及属性选择器。
对于angular 的样式隔离的问题,比较重要的就是属性选择器。在属性选择器中,通过给元素添加任意一个属性,可以准确地选中这个元素。比如说,
a[target] { background-color:yellow;}
通过上面的选择器,我们可以选中所有带有target属性的a元素。
另外一个是后代选择器。
在css 中,后代选择器会选择指定元素的所有后代元素。比如,
[attr] span { color: green;}
这个选择器会首先选中带有attr 属性的元素,然后选中这个元素的所有后代span 元素。
有了css 属性选择器和后代选择器,就有了需要完成组件样式隔离的所有工具。angular 中组件的样式隔离与::ng-deep 完全基于这两个内容。
angular 样式隔离实现机制
我们现在回到之前的angular组件child 组件的内容为
//child.componet.html<span class="child-span">child span</span>//child.component.scss.child-span { color: red;}
parent 组件的内容为
//parent.component.html<app-child></app-child>
上面两个组件经过angular 处理以后,生成的html 内容如下

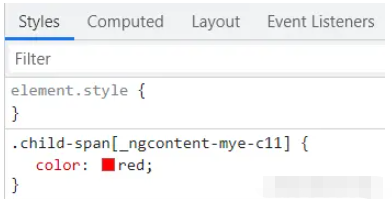
可以看到,parent 组件上面多了_ngcontent-mye-c13 和_nghost-mye-c12 两个属性,而child 组件上面多了_ngcontent-mye-c12 和_nghost-mye-c11 两个属性,child 组件下的span 标签,增加了_nghost-mye-c11 属性。
对于scss 文件,经过angular 的处理以后,在child 组件中的.child-span 类,变成了.child-span[_nghost-mye-c11]。

通过这些内容我们就可以看出来angular 的样式隔离就是利用属性选择器完成的。
_nghost-mye-c11 这个属性只会出现在child 组件中。在child.component.scss 中的.child-span类变成了.child-span[_nghost-mye-c11],根据之前提到的属性选择器的机制,.child-span 只会对child 组件的内容生效。
如果在parent 组件内部也写一个.child-span类选择器,那么生成的类选择器就会是.child-span[_nghost-mye-c12]。而_nghost-mye-c12 这个属性是属于parent 组件的,于是这个.child-span 类只会对parent 组件的内容生效。并不会影响到child 组件,样式的隔离也就完成了。
::ng-deep
那为什么通过::ng-deep 可以在parent 组件里面,覆盖child 组件中的内容呢?
//parent.component.scssapp-child { ::ng-deep { .child-span { color: green; } }}
上面的内容通过angular 处理以后,生成的内容为app-child[_nghost-mye-c12] .child_span。位于::ng-deep 后面的类,去掉了自动添加的属性,这时候根据css 的后代选择器机制。app-child[_nghost-mye-c12] .child_span会选中child 组件下面的所有带有.child_span 类的标签,而且根据优先级计算,app-child[_nghost-mye-c12] .child_span 高于child 组件生成的.child_span[_nghost-mye-c11] ,于是child 组件中的样式就被覆盖掉了。
那为什么有时候::ng-deep不能够覆盖掉呢?比如,当child 组件代码如下的时候
//child.componet.html<div class="child-div"> <span class="child-span">child span</span></div>//child.component.scss.child-div { .child-span { color: red; }}
这时候即使我们发现child 组件中span 的颜色依旧是红色。
实际上原因也不复杂,检查angular 生成的样式文件后,我们可以发现,之所以没有把覆盖掉,纯粹是因为css 选择器优先级的问题。child 组件生成的样式.child-div[_nghost-mye-c11] .child-span[_nghost-mye-c11] 优先级高于parent 组件生成的样式app-child[_nghost-mye-c12] .child。于是,我们看到的效果就是parent 组件中的::ng-deep 没有生效,一种比较快捷的做法是直接在parent 组件的样式后面加上!important。但是由于!important 权重太高的原因,并不是很推荐。歪个楼,在发现angular ::ng-deep 失效的原因之前,很遗憾,项目之前很多地方的都有这种用法。
另一个方法就是,既然是因为优先级不够,那么提高parent 组件生成的样式的优先级就可以了。修改parent 组件的代码为
:host { app-child { ::ng-deep { .child-div { .child-span { color: green; } } } }}
这时候,parent 组件生成的样式[_nghost-mye-c12] app-child[_nghost-mye-c12] .child-div .child-span 优先级高于child 组件生成的样式.child-div[_nghost-mye-c11] .child-span[_nghost-mye-c11] ,child 组件中span 的颜色也就变绿了。
这里我们使用了:host 关键字,接下来,我们简单看看它的作用。
:host
上个小结中,parent 组件生成的样式是[_nghost-mye-c12] app-child[_nghost-mye-c12] .child-div .child-span,如果去掉:host,就会发现,生成的样式变成了app-child[_nghost-mye-c12] .child-div .child-span。所以:host 关键字只是给生成的样式,加上了parent 组件属性字段而已。
那这个:host有什么用呢?
常见的作用有两个。
一个就是选择当前的组件标签,在angular 中,我们自定义的组件,比如这里的parent 组件app-parent 和child 组件app-child 最后都是会渲染到生成的html 文档上的。如果需要选中这些标签,就可以使用:host 关键字。
另一个作用还是隔离样式,将class 类写在:host 内部,这个类无论如何也是不可能泄漏到全局去的。实际上,通过前面的内容分析可以发现,不写在:host 里面,也不会泄漏到全局。但是如果出现了以下的情况
//some.component.scss::ng-deep { .random-class { xxxx }}
这个类经过angular 处理以后,最后会变为
.random-class { xxxx}
random-class 将会对全局造成影响。
但是如果把它包裹在:host 内部,哪怕使用了::ng-deep 关键字,最多也只会影响到这个组件的后代元素。所以在angular 官方文档中有下面的一段话。
Applying the
::ng-deeppseudo-class to any CSS rule completely disables view-encapsulation for that rule. Any style with::ng-deepapplied becomes a global style. In order to scope the specified style to the current component and all its descendants, be sure to include the:hostselector before::ng-deep. If the::ng-deepcombinator is used without the:hostpseudo-class selector, the style can bleed into other components.
以上就是“angular如何进行样式隔离”这篇文章的所有内容,感谢各位的阅读!相信大家阅读完这篇文章都有很大的收获,小编每天都会为大家更新不同的知识,如果还想学习更多的知识,请关注编程网行业资讯频道。


