这篇文章将为大家详细讲解有关在CentOS下怎样安装NistNet,文章内容质量较高,因此小编分享给大家做个参考,希望大家阅读完这篇文章后对相关知识有一定的了解。
1、操作系统CentOS安装:
经过多次安装测试CentOS安装,采用完整版光盘安装,因为安装nistnet需要编译内核
2、CentOS安装后,下载相关软件包
linux-2.6.18.8.tar.gz
下载地址如:http://www.kernel.org/pub/linux/kernel/v2.6/
nistnet.2.0.12c.tar.gz
下载地址如:http://www-x.antd.nist.gov/cgi-bin/nistnet-distribution
3、编译内核
# tar zxvf linux-2.6.18.8.tar.gz
# cd /usr/src/
# ln –s /root/ linux-2.6.18.8/ linux
# cd linux
# make mrproper //删除不稳定的.o文件和.config文件
# make menuconfig
Device Drivers --->
| Character devices -->
| Enhanced Real Time Clock Suppot --M //按M键,设置
# make dep //连接程序代码和函数库
# make clean //删不必要的模块
# make bzImage //生成内核文件
# cp arch/i386/boot/bzImage /boot/vmlinuz-2.6.18-8_new //注意正确路径
# make modules //编译外挂模块
# make modules_install //安装编译完成的模块
# make install
# mkinitrd /boot/initrd-2.6.18-8_new.img 2.6.18.8
# vi /boot/grub/grub.conf //添加启动项,内容如下:
title Centos (2.6.18-8_new)
root (hd0,0)
kernel /vmlinuz-2.6.18-8_new ro root=/dev/VolGroup00/LogVol00 rhgb quiet
initrd /initrd-2.6.18-8_new.img
//注意default=x (x为以上添加的选项,从0开始)
# init 6
4、CentOS安装NistNet
# tar zxvf nistnet.2.0.12c.tar.gz
# ln –s nistnet-3.0a nistnet
# cd nistnet
# ./ configure
# make
#*********************此处会出现error需要作以下修改**********************
1)、~/nistnet-3.0a/kernel/knistnet.c
找到916、961、972、1003行,添加参数NULL,如:
return ippt->func(skb, dev, ippt);à return ippt->func(skb, dev, ippt,NULL);
2)、/lib/modules/2.6.18.8/build/include/asm/rwsem.h
找到104、156、198、224、249行,(不知道汇编的具体含义)注释掉,如:
LOCK_SECTION_START("") à // LOCK_SECTION_START("")
3)、/lib/modules/2.6.18.8/build/include/asm/semaphore.h
找到105、130、155、179行,(不知道汇编的具体含义)注释掉,如:
LOCK_SECTION_START("") à // LOCK_SECTION_START("")
#*********************再重新编译******************************************
# make
# make install
5、测试安装是否成功
# cd ~nistnet/
# ./Load nistnet
# cnistnet –u
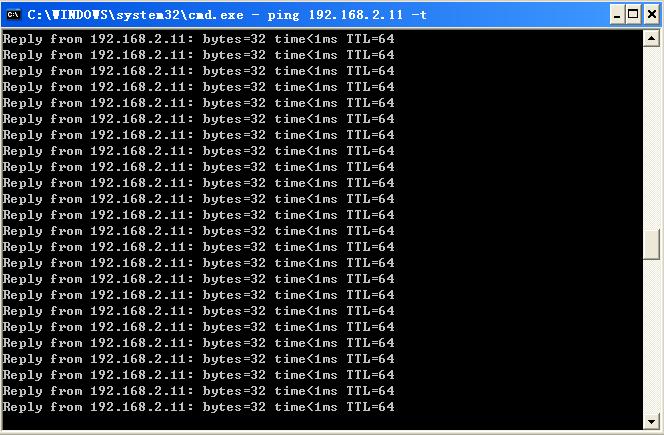
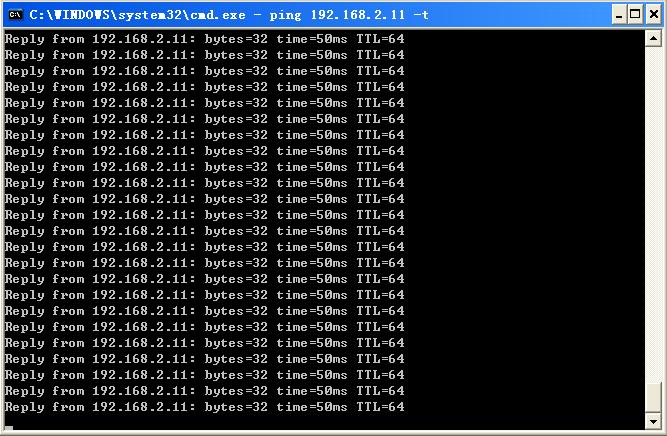
查看ping的情况:

[root@localhost nistnet]# cnistnet -a 192.168.2.2 192.168.2.11 --delay 50
addnistnet: 192.168.2.2:0 to 192.168.2.11:0 (prot 0 cos 0),
delay 50.000000 (sigma 0.000000 corr 0.000000),
bandwidth 0, drop 0.000000 (corr 0.000000),
dup 0.000000 (corr 0.000000),
drdmin 0, drdmax 0, drdcongest 0
[root@localhost nistnet]#

[root@localhost nistnet]# cnistnet -a 192.168.2.2 192.168.2.11 --drop 50
addnistnet: 192.168.2.2:0 to 192.168.2.11:0 (prot 0 cos 0),
delay 0.000000 (sigma 0.000000 corr 0.000000),
bandwidth 0, drop 50.000000 (corr 0.000000),
dup 0.000000 (corr 0.000000),
drdmin 0, drdmax 0, drdcongest 0
[root@localhost nistnet]#
6、CentOS安装NistNet完成

关于在CentOS下怎样安装NistNet就分享到这里了,希望以上内容可以对大家有一定的帮助,可以学到更多知识。如果觉得文章不错,可以把它分享出去让更多的人看到。


