目录
人脸识别4:Android InsightFace实现人脸识别Face Recognition(含源码)
(2)依赖库说明(OpenCV+OpenCL+base-utils+TNN)
(8) 运行APP闪退:dlopen failed: library "libomp.so" not found
1. 前言
这是项目《人脸识别Face Recognition》系列之《Android InsightFace实现人脸识别Face Recognition》;项目基于开源ArcFace(也称InsightFace)模型搭建一套完整的Android人脸识别系统(Face Recognition or Face Identification);我们将开发一个简易的、可实时运行的人脸识别Android Demo。Android版本人脸识别模型推理支持CPU和GPU加速,在GPU(OpenCL)加速下,可以达到实时的人脸识别效果,非常适合在Linux开发板和Android系统开发板上部署。

整套人脸识别系统核心算法包含人脸检测和人脸关键点检测,人脸校准,人脸特征提取以及人脸比对(1:1)和人脸搜索(1:N)。本项目人脸识别系统可以达到目前商业级别的人脸识别准确率,在误识率(FAR)0.1%的情况下,可提供99.78%的通过率(TAR);可以满足人脸比对,人脸签到、人脸门禁、人员信息查询、安防监控等人脸识别应用场景。
Android版本人脸检测和人脸识别效果:


【尊重原创,转载请注明出处】https://blog.csdn.net/guyuealian/article/details/130600600
更多项目《人脸识别Face Recognition》系列文章请参考:
- 人脸识别1:人脸识别数据集https://blog.csdn.net/guyuealian/article/details/130600545
- 人脸识别2:InsightFace实现人脸识别Face Recognition(含源码下载)人脸识别2:InsightFace实现人脸识别Face Recognition(含源码下载)_insightface 识别_AI吃大瓜的博客-CSDN博客
- 人脸识别3:C/C++ InsightFace实现人脸识别Face Recognition(含源码)人脸识别3:C/C++ InsightFace实现人脸识别Face Recognition(含源码)_AI吃大瓜的博客-CSDN博客
- 人脸识别4:Android InsightFace实现人脸识别Face Recognition(含源码)https://blog.csdn.net/guyuealian/article/details/130600600

2. 项目说明
项目依赖库主要有OpenCV,base-utils,TNN和OpenCL(用于加速),项目源码已经包含了相关依赖库,且都已经配置好,无需安装;使用Android Studio直接build即可运行App Demo ;
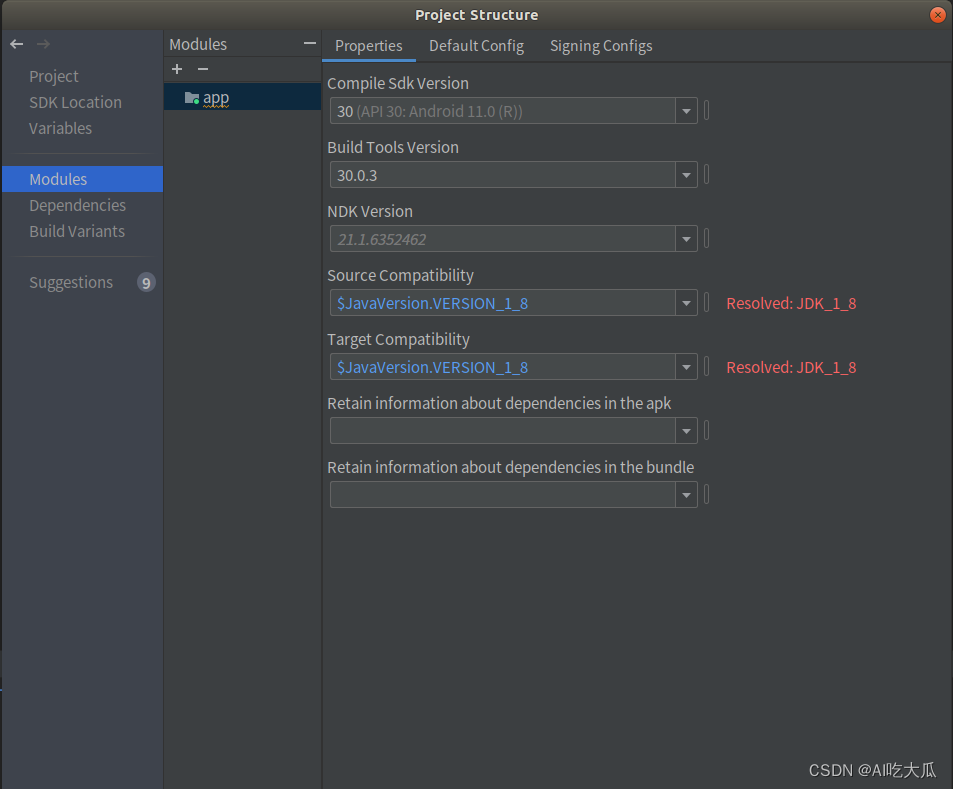
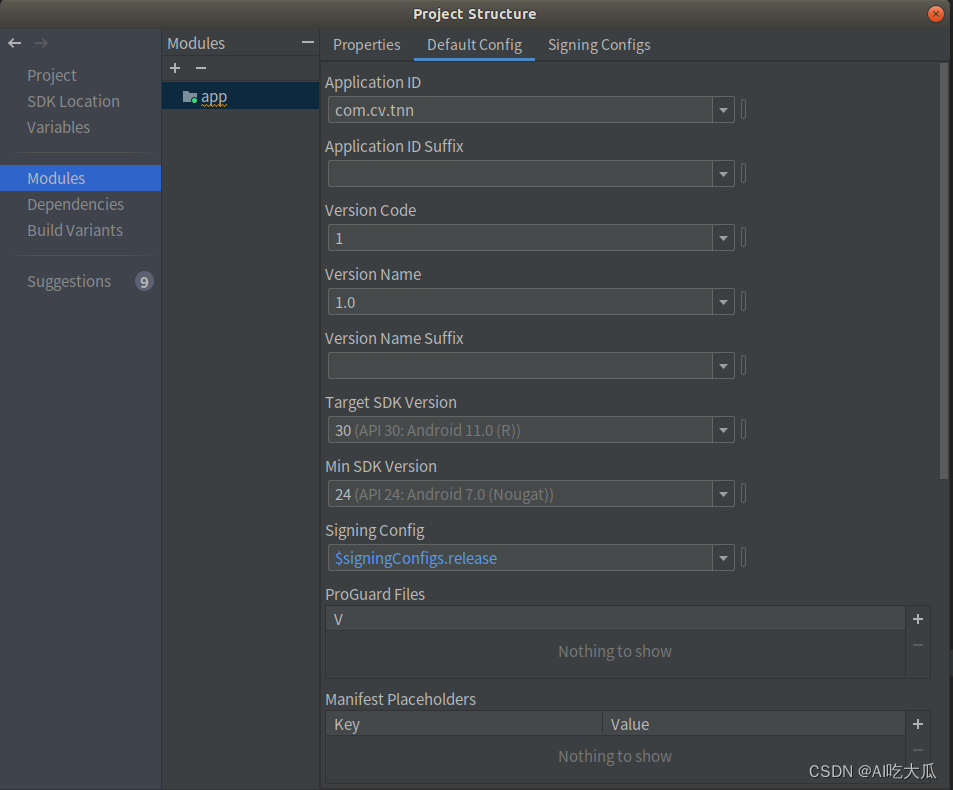
(1)开发版本
Android SDK,NDK,Jave等版本信息,请参考:


(2)依赖库说明(OpenCV+OpenCL+base-utils+TNN)
项目模型推理采用TNN部署框架(支持多线程CPU和GPU加速推理);图像处理采用OpenCV库,模型加速采用OpenCL,在普通手机设备即可达到实时处理。项目Android源码已经配置好OpenCV+OpenCL+base-utils+TNN依赖库,无需重新配置,Android Studio直接build,即可运行。
- OpenCV:图像处理(如读取图片,图像裁剪等)都需要使用OpenCV库进行处理(无需安装,项目已经配置了)
- OpenCL:OpenCL用于模型GPU加速,若不使用OpenCL进行模型推理加速,纯C++推理模型,速度会特别特别慢(无需安装,项目已经配置了)
- base-utils:是个人开发常用的C++库,集成了C/C++ OpenCV等常用的算法:https://github.com/PanJinquan/base-utils (无需安装,项目已经配置了)
- TNN:模型推理框架:https://github.com/Tencent/TNN (无需安装,项目已经配置了)
(3)CMake配置
人脸识别核心算法均采用C++实现,上层Java应用使用JNI调用底层算法,CMake最低版本3.5.0,这是CMakeLists.txt,其中主要配置OpenCV+OpenCL+base-utils+TNN这四个库:
cmake_minimum_required(VERSION 3.5.0)project("TNN")add_compile_options(-fPIC) # fix Bug: can not be used when making a shared object#set(CMAKE_BUILD_TYPE Release)#set(CMAKE_BUILD_TYPE "Release" CACHE STRING "Build type (default Debug)" FORCE)#set(CMAKE_CXX_FLAGS "-Wall -std=c++11 -pthread")set(CMAKE_BUILD_TYPE "Release" CACHE STRING "set build type to release" FORCE)# opencv set# copy `OpenCV-android-sdk/sdk` to `3rdparty/opencv/`set(OpenCV_DIR ${CMAKE_SOURCE_DIR}/3rdparty/opencv/sdk/native/jni)find_package(OpenCV REQUIRED)include_directories(${CMAKE_SOURCE_DIR}/3rdparty/opencv/sdk/native/jni/include)# base_utilsset(BASE_ROOT 3rdparty/base-utils) # 设置base-utils所在的根目录add_subdirectory(${BASE_ROOT}/base_utils/ base_build) # 添加子目录到build中include_directories(${BASE_ROOT}/base_utils/include)include_directories(${BASE_ROOT}/base_utils/src)MESSAGE(STATUS "BASE_ROOT = ${BASE_ROOT}")# TNN set# Creates and names a library, sets it as either STATIC# or SHARED, and provides the relative paths to its source code.# You can define multiple libraries, and CMake builds it for you.# Gradle automatically packages shared libraries with your APK.# build for platform# set(TNN_BUILD_SHARED OFF CACHE BOOL "" FORCE)if (CMAKE_SYSTEM_NAME MATCHES "Android") set(TNN_OPENCL_ENABLE ON CACHE BOOL "" FORCE) set(TNN_ARM_ENABLE ON CACHE BOOL "" FORCE) set(TNN_BUILD_SHARED OFF CACHE BOOL "" FORCE) set(TNN_OPENMP_ENABLE ON CACHE BOOL "" FORCE) # Multi-Thread #set(TNN_HUAWEI_NPU_ENABLE OFF CACHE BOOL "" FORCE) add_definitions(-DTNN_OPENCL_ENABLE) # for OpenCL GPU add_definitions(-DTNN_ARM_ENABLE) # for Android CPU add_definitions(-DDEBUG_ANDROID_ON) # for Android Log add_definitions(-DPLATFORM_ANDROID)elseif (CMAKE_SYSTEM_NAME MATCHES "Linux") set(TNN_OPENCL_ENABLE ON CACHE BOOL "" FORCE) set(TNN_CPU_ENABLE ON CACHE BOOL "" FORCE) set(TNN_X86_ENABLE OFF CACHE BOOL "" FORCE) set(TNN_QUANTIZATION_ENABLE OFF CACHE BOOL "" FORCE) set(TNN_OPENMP_ENABLE ON CACHE BOOL "" FORCE) # Multi-Thread add_definitions(-DTNN_OPENCL_ENABLE) # for OpenCL GPU add_definitions(-DDEBUG_ON) # for WIN/Linux Log add_definitions(-DDEBUG_LOG_ON) # for WIN/Linux Log add_definitions(-DDEBUG_IMSHOW_OFF) # for OpenCV show add_definitions(-DPLATFORM_LINUX)elseif (CMAKE_SYSTEM_NAME MATCHES "Windows") set(TNN_OPENCL_ENABLE ON CACHE BOOL "" FORCE) set(TNN_CPU_ENABLE ON CACHE BOOL "" FORCE) set(TNN_X86_ENABLE ON CACHE BOOL "" FORCE) set(TNN_QUANTIZATION_ENABLE OFF CACHE BOOL "" FORCE) set(TNN_OPENMP_ENABLE ON CACHE BOOL "" FORCE) # Multi-Thread add_definitions(-DTNN_OPENCL_ENABLE) # for OpenCL GPU add_definitions(-DDEBUG_ON) # for WIN/Linux Log add_definitions(-DDEBUG_LOG_ON) # for WIN/Linux Log add_definitions(-DDEBUG_IMSHOW_OFF) # for OpenCV show add_definitions(-DPLATFORM_WINDOWS)endif ()set(TNN_ROOT 3rdparty/TNN)include_directories(${TNN_ROOT}/include)include_directories(${TNN_ROOT}/third_party/opencl/include)add_subdirectory(${TNN_ROOT}) # 添加外部项目文件夹set(TNN -Wl,--whole-archive TNN -Wl,--no-whole-archive)# set TNN libraryMESSAGE(STATUS "TNN_ROOT = ${TNN_ROOT}")# NPU Setif (TNN_HUAWEI_NPU_ENABLE) add_library(hiai SHARED IMPORTED) set_target_properties(hiai PROPERTIES IMPORTED_LOCATION ${CMAKE_SOURCE_DIR}/src/main/jni/thirdparty/hiai_ddk/${ANDROID_ABI}/libhiai.so) add_library(hiai_ir SHARED IMPORTED) set_target_properties(hiai_ir PROPERTIES IMPORTED_LOCATION ${CMAKE_SOURCE_DIR}/src/main/jni/thirdparty/hiai_ddk/${ANDROID_ABI}/libhiai_ir.so) add_library(hiai_ir_build SHARED IMPORTED) set_target_properties(hiai_ir_build PROPERTIES IMPORTED_LOCATION ${CMAKE_SOURCE_DIR}/src/main/jni/thirdparty/hiai_ddk/${ANDROID_ABI}/libhiai_ir_build.so)endif ()find_library( # Sets the name of the path variable. log-lib # Specifies the name of the NDK library that # you want CMake to locate. log)# Specifies libraries CMake should link to your target library. You# can link multiple libraries, such as libraries you define in the# build script, prebuilt third-party libraries, or system libraries.# dmcv库include_directories(src)set(SRC_LIST src/face_alignment.cpp src/face_recognizer.cpp src/face_feature.cpp src/object_detection.cpp src/Interpreter.cpp)MESSAGE(STATUS "DIR_SRCS = ${SRC_LIST}")# JNI接口库add_library(tnn_wrapper SHARED jni_interface.cpp ${SRC_LIST})target_link_libraries( # Specifies the target library. tnn_wrapper -ljnigraphics # Links the target library to the log library # included in the NDK. ${log-lib} ${android-lib} ${jnigraphics-lib} ${TNN} ${OpenCV_LIBS} base_utils )if (TNN_HUAWEI_NPU_ENABLE) target_link_libraries( # Specifies the target library. tnn_wrapper hiai hiai_ir hiai_ir_build)endif ()3. 人脸识别系统
人脸识别主要包含人脸比对(1:1)和人脸搜索(1:N)两大功能,涉及的核心算法主要包含:人脸检测和人脸关键点检测,人脸校准,人脸特征提取以及人脸比对(1:1)和人脸搜索(1:N);当然,实际业务中,可能还会增加人脸质量检测以及活体识别等算法,碍于篇幅,后续再分享活体识别算法。
下图给出本项目人脸识别系统算法实现架构流程图:

(1)人脸识别的核心算法
项目实现了人脸识别的核心算法,包含人脸检测和人脸关键点检测,人脸校准,人脸特征提取以及人脸比对(1:1)和人脸搜索(1:N)等功能,可以参文件(src/main/java/com/cv/tnn/model/FaceRecognizer.java),实现人脸识别的基本功能
package com.cv.tnn.model;import android.graphics.Bitmap;import android.graphics.BitmapFactory;import android.util.Log;import java.io.File;import java.util.List;public class FaceRecognizer { private static final String TAG = "FaceRecognizer"; public FaceRecognizer(String det_model, String rec_model, String root, String database, int model_type, int num_thread, boolean useGPU) { Log.w(TAG, "det_model =" + det_model); Log.w(TAG, "rec_model =" + rec_model); Log.w(TAG, "root =" + root); Log.w(TAG, "database =" + database); Log.w(TAG, "model_type=" + model_type); Log.w(TAG, "num_thread=" + String.valueOf(num_thread)); Log.w(TAG, "useGPU =" + String.valueOf(useGPU)); FileChooseUtil.createFolder(root); Detector.init(det_model, rec_model, root, database, model_type, num_thread, useGPU); } public FrameInfo[] detectFace(Bitmap bitmap, float det_conf_thresh, float det_iou_thresh) { FrameInfo[] result = null; result = Detector.detectFace(bitmap, det_conf_thresh, det_iou_thresh); return result; } public void registerFromFolder(String folder, float det_conf_thresh, float det_iou_thresh) { Log.w(TAG, "database folder=" + folder); List image_list = FileChooseUtil.getImagePathFromSD(folder); for (int i = 0; i < image_list.size(); i++) { String image_file = image_list.get(i); FrameInfo[] result = registerFromFile(image_file, det_conf_thresh, det_iou_thresh); } } public FrameInfo[] registerFromFile(String image_file, float det_conf_thresh, float det_iou_thresh) { String[] paths = image_file.split(File.separator); String basename = paths[paths.length - 1]; String face_id = basename.split("-")[0]; if (face_id.length() == basename.length()) { Log.w(TAG, "file=" + image_file + ",图片名称不合法,请将图片按照[ID-XXXX.jpg]命名,如:张三-image.jpg"); } Bitmap bitmap = BitmapFactory.decodeFile(image_file); FrameInfo[] result = registerFromBitmap(face_id, bitmap, det_conf_thresh, det_iou_thresh); if (result.length > 0) { Log.w(TAG, "file=" + image_file + ",注册人脸成功:ID=" + face_id); } else { Log.w(TAG, "file=" + image_file + ",注册人脸失败:ID=" + face_id); } return result; } public FrameInfo[] registerFromBitmap(String face_id, Bitmap bitmap, float det_conf_thresh, float det_iou_thresh) { FrameInfo[] result = null; //bitmap = bitmap.copy(Bitmap.Config.ARGB_8888, true); result = Detector.registerFace(face_id, bitmap, det_conf_thresh, det_iou_thresh); return result; } public FrameInfo[] detectSearch(Bitmap bitmap, int max_face, float det_conf_thresh, float det_iou_thresh, float rec_conf_thresh) { FrameInfo[] result = null; result = Detector.detectSearch(bitmap, max_face, det_conf_thresh, det_iou_thresh, rec_conf_thresh); return result; } public float compareFace(Bitmap bitmap1, Bitmap bitmap2, float det_conf_thresh, float det_iou_thresh) { return Detector.compareFace(bitmap1, bitmap2, det_conf_thresh, det_iou_thresh); } public FrameInfo[] getFeature(Bitmap bitmap, int max_face, float det_conf_thresh, float det_iou_thresh) { FrameInfo[] result = null; result = Detector.getFeature(bitmap, max_face, det_conf_thresh, det_iou_thresh); return result; } public void clearDatabase() { Detector.clearDatabase(); }} (2)人脸检测和关键点检测
人脸检测的方法比较多,项目Python版本人脸识别提供两种人脸检测方法:一种是基于MTCNN的通用人脸检测模型,另一种是轻量化的、快速的RFB人脸检测模型;这个两个模型都能实现人脸检测,并同时预测人脸的五个关键点(Landmark)。C/C++和Android版本只提供RFB人脸检测和关键点检测模型。
| 模型 | Paper | 源码 | 说明 |
| MTCNN | Paper | Link |
|
| RFB | Paper | Link |
|
(3)人脸校准
利用Landmark信息,可以通过仿射变换,对人脸进行校准,获得相对比较正的人脸,项目src/face_alignment.h模块提供人脸校准算法。
其中实现思路是:
利用OpenCV的estimateAffine2D()函数估计人脸关键点(5个landmark)和参考人脸关键点(reference landmark)的仿射变换矩阵M,再根据仿射变换矩阵M矫正人脸图像
下图给出C++人脸校准的效果图,其中【image】是原始图像,而【FaceAlignment】是最终矫正的人脸效果图。

(4)人脸特征提取
项目基于开源的ArcFace(也称InsightFace)训练框架,开发并优化了三个版本的人脸识别模型:mobilenet_v2,IR-18(resnet18优化版)以及IR-50(resnet50优化版),用于人脸特征提取
ArcFace:GitHub - TreB1eN/InsightFace_Pytorch: Pytorch0.4.1 codes for InsightFace
| 模型 | LFW | CFP_FF | CFP_FP | AgeDB | CALFW | CPLFW |
|---|---|---|---|---|---|---|
| resnet50 | 99.78 | 99.69 | 98.14 | 97.53 | 95.87 | 92.45 |
| resnet18 | 99.55 | 99.61 | 97.74 | 96.52 | 94.66 | 90.01 |
| mobilenet_v2 | 99.23 | 99.27 | 90.74 | 93.22 | 93.57 | 88.69 |
resnet50和resnet18参数量比较大,计算量较大,适合在PC服务器部署 ;而mobilenet_v2
模型计算量较小,适合嵌入式,开发板,Android等终端部署。
PS:resnet18和resnet50参数量比较大,需要比较大的内存,部分低端手机可能会崩溃,建议手机端使用mobilenet_v2模型
(5)人脸比对(1:1)
1人脸比对(也称人脸验证,身份验证),即将两张人脸进行1:1比对,得到人脸相似度,来判断是否是同一个人,一般用作人证比对等场景,比如银行卡/QQ/微信/支付宝等账号登录时人脸身份验证。
public float compareFace(Bitmap bitmap1, Bitmap bitmap2, float det_conf_thresh, float det_iou_thresh) { return Detector.compareFace(bitmap1, bitmap2, det_conf_thresh, det_iou_thresh); }(6)人脸搜索(1:N)
N人脸搜索,将一张人脸和N张人脸进行比对,找出最相似的一张或多张人脸,即1:N人脸搜索。可用作人脸签到、人脸门禁、人员信息查询、安防监控等应用场景。
App Demo实现了1:N人脸搜索功能,1:N人脸搜索需要提前生成人脸数据库(Face database),先录入注册人脸数据,Android APP注册人脸支持两种方式:
- 手动注册:通过打开手机图库相册,选择单张人脸图像(个人照片)进行注册;需要一张一张手动注册人脸,数量比较多时,比较耗手。
- 批量注册:批量注册人脸,需要将人脸图像(个人照片)按照[ID-XXXX.jpg]命名,如:张三-image.jpg,作为人脸识别的底图;并将图片拷贝到手机目录:DCIM/face-dataset/database/portrait(文件夹不存在,自己新建即可);项目已经提供demo验证数据:face-dataset.zip,用户可以自己解压,并把数据face-dataset拷贝到手机内部存储卡DCIM目录下即可;数据存放好后,可以点击APP的【批量注册】
人脸图像要求满足以下:
- 个人照片可以是个人证件照,生活照,肖像照片,要求五官清晰且正脸的照片,不能出现多个人脸的情况
- 尽量不要出现过度美颜,头发遮挡,低头侧脸等问题
| 手动注册 | 批量注册 |
 |  |
public FrameInfo[] registerFromBitmap(String face_id, Bitmap bitmap, float det_conf_thresh, float det_iou_thresh) { FrameInfo[] result = null; //bitmap = bitmap.copy(Bitmap.Config.ARGB_8888, true); result = Detector.registerFace(face_id, bitmap, det_conf_thresh, det_iou_thresh); return result; } public FrameInfo[] detectSearch(Bitmap bitmap, int max_face, float det_conf_thresh, float det_iou_thresh, float rec_conf_thresh) { FrameInfo[] result = null; result = Detector.detectSearch(bitmap, max_face, det_conf_thresh, det_iou_thresh, rec_conf_thresh); return result; }完成人脸注册后,下一步可以进行1:N人脸搜索,实现人脸识别的功能,点击手机APP的【图片】、【视频】或者【相机】可测试人脸识别效果
(7)人脸识别优化建议
- 人脸识别依赖人脸检测,一个高精度的人脸检测模型算法,可以有效提高人脸识别的准确率
- 人脸校准算法可以矫正人脸倾斜等问题,可以极大提高人脸识别效果;需要依赖人脸关键点检测(Landmark),本项目使用的RFB模型预测人脸关键点
- 人脸识别中,待识别人脸图片,如果存在低头侧脸,或者人脸存在遮挡等情况,人脸识别准确率较低(可能被识别为unknown),实际使用过程中,需要用户配合,正对着摄像头,以提高人脸识别准确率的效果。
- 1:N人脸搜索中,要求注册底库的人脸数据库是高质量的个人照片;建议每人需要提供一张高清的、不模糊的、少美颜的,五官清晰可见的,正脸的,不低头不侧脸的个人自拍照(生活照、证件照),以便可以生成高质量的人脸特征
- 1:N人脸搜索中,当N属于百万级别以上海量人脸数据时,人脸识别会比较慢,毕竟需要遍历人脸进行特征匹配,性能较差;解决方法是可以采用人脸特征聚类,分而治之的思路;目前已有很多开源框架,感兴趣的可以参考Faiss 、milvus等库。
- 目前,项目暂不支持人脸真伪鉴别(活体识别),后续计划开发基于RGB的活体识别功能,敬请期待哈
(8) 运行APP闪退:dlopen failed: library "libomp.so" not found
解决方法:dlopen failed: library “libomp.so“ not found_AI吃大瓜的博客-CSDN博客
4. 人脸识别Android Demo效果
下图是Android版本的人脸识别Demo效果,图中绘制了绿色框,框上面文本是人脸识别结果和匹配相似度(置信度);当置信度小于rec_thresh=0.5时,人脸识别结果为unknown,表示未知。
人脸识别Android Demo App体验: https://pan.baidu.com/s/1cAqXUA1_qzbA7VujDY2JIA 提取码: 6e6g


5. 人脸识别Python版本源码下载
参考文章 《人脸识别2:InsightFace实现人脸识别Face Recognition(含源码下载)》人脸识别2:InsightFace实现人脸识别Face Recognition(含源码下载)_insightface 识别_AI吃大瓜的博客-CSDN博客

6. 人脸识别C/C++版本源码下载
人脸识别3:C/C++ InsightFace实现人脸识别Face Recognition(含源码)人脸识别3:C/C++ InsightFace实现人脸识别Face Recognition(含源码)_AI吃大瓜的博客-CSDN博客

7. 人脸识别Android版本源码下载
- 整套项目源码下载地址:人脸识别4:Android InsightFace实现人脸识别Face Recognition(含源码)
- 人脸识别Android Demo App体验: https://pan.baidu.com/s/1cAqXUA1_qzbA7VujDY2JIA 提取码: 6e6g
项目源码包含内容:
- 提供轻量化的、快速的RFB人脸检测模型,该模型可实现人脸检测,并同时预测人脸的五个关键点(Landmark)。
- 提供三个人脸识别特征提取模型:mobilenet_v2,IR-18(resnet18优化版)以及IR-50(resnet50优化版),用于人脸特征提取;PS:resnet18和resnet50参数量比较大,需要比较大的内存,部分低端手机可能会崩溃,建议手机端使用mobilenet_v2模型
- 提供1:1人脸比对:可用于人证比对等场景
- 提供人脸注册功能:APP支持手动注册和批量注册人脸,项目自带人脸识别测试数据,可用于验证人脸识别效果
- 提供1:N人脸搜索:可用于人脸签到、人脸门禁、人员信息查询、安防监控等应用场景
- 项目1:N人脸搜索:APP支持图片,视频和摄像头测试
来源地址:https://blog.csdn.net/guyuealian/article/details/130600600


