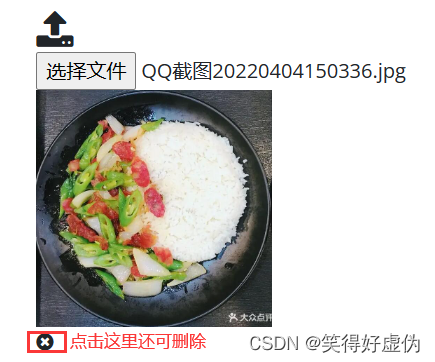
效果图
效果:


这篇博客必须要后台调用你的js函数,如果后台不打算调用你的js函数可以放弃此篇博客了,或者自己将代码改良。如果后台接受该代码可以参考这篇文章:(如果后台不是使用php,也没关系只要返回的数据是这样也能行)php如何处理前端上传的图片
<literal><script>window.parent.create_product.success('/uploads/20230109/74da42c5c3fbead6320a373a40a4ee2d.jpghttps://blog.csdn.net/qq_48082548/article/details/')</script></literal>
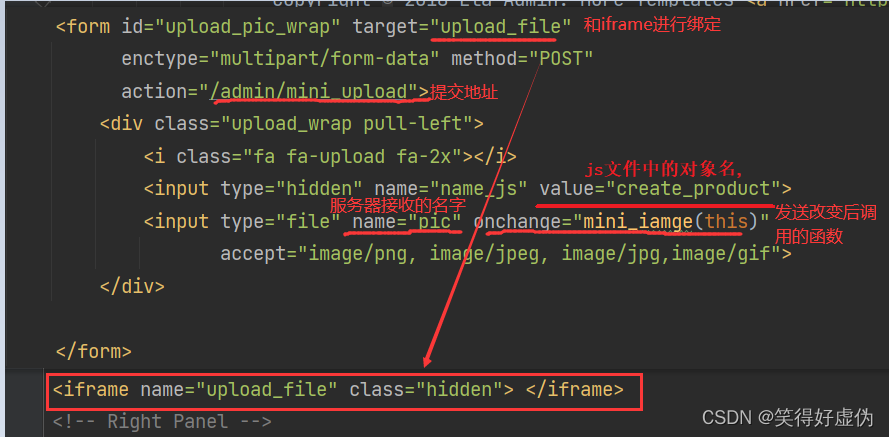
html代码
<form id="upload_pic_wrap" target="upload_file" enctype="multipart/form-data" method="POST" action="/admin/mini_upload"> <div class="upload_wrap pull-left"> <i class="fa fa-upload fa-2x">i> <input type="hidden" name="name_js" value="create_product"> <input type="file" name="pic" onchange="mini_iamge(this)"accept="image/png, image/jpeg, image/jpg,image/gif"> div>form><iframe name="upload_file" class="hidden"> iframe><script> function mini_iamge(that){ console.log(window.parent.updata_product); //设置图片上限为5MB var iamge_size=5000000; var width_size=650; var height_size=600; //限制封面图上传图片的大小 function image_size(w,h,s) { if (s>iamge_size || s<=0){ alert("封面图请上传大于0MB,小于5MB的图片"); return } //如果不需要做限制直接提交表单就可以了 if ((w<width_size-50 || w>width_size+50) || (h<height_size-50 || h>height_size+50)){ var width_d=width_size+50 var width_x=width_size-50 alert("请将图片的长设置在:'"+width_x+"'~'"+width_d+"'之间,"+ "\n请将图片的宽设置在:'"+(height_size-50)+"'~'"+(height_size+50)+"'之间,"+"\n上传的图片长为:'"+(w)+" 宽为:"+(h)); return; }//提交表单 jQuery("#create_form #upload_pic_wrap").submit(); } //获取上传图片的大小 if (that.files) { var f = that.files[0]; var reader = new FileReader(); reader.onload = function (e) { var data = e.target.result; //加载图片获取图片真实宽度和高度 var image = new Image(); image.onload = function () { var width = image.width; var height = image.height; var fileSize = f.size; image_size( width, height, fileSize); }; image.src = data; }; reader.readAsDataURL(f); } else { var image = new Image(); image.onload = function () { var width = image.width; var height = image.height; var fileSize = image.fileSize; image_size( width, height, fileSize); } } }script>从上面的代码可以看出来是使用iframe无刷新技术上传的图片,还使用了js限制了图片上传的大小,如果不需要做相关的代码删除即可。

js
记得需要在html文件中导入此js
//create_product html中的input value值var create_product = {//上传封面图失败的函数 error: function (msg) { alert(msg); }, //点击x删除的函数 delete_img:function () { jQuery("#upload_pic_wrap .del_image").unbind().click(function () { jQuery(this).parent().remove(); }) }, //上传成功的函数,file_key后台返回来的图片地址 success: function (file_key) { if (!file_key) { return; } var html = ' + file_key + '"/>https://blog.csdn.net/qq_48082548/article/details/' + '+ file_key + '">https://blog.csdn.net/qq_48082548/article/details/'; if (jQuery("#upload_pic_wrap .pic-each").size() > 0) { jQuery("#upload_pic_wrap .pic-each").html(html); } else { jQuery("#upload_pic_wrap").append('https://blog.csdn.net/qq_48082548/article/details/' + html + https://blog.csdn.net/qq_48082548/article/details/'https://blog.csdn.net/qq_48082548/article/details/'); } create_product.delete_img(); }, };
来源地址:https://blog.csdn.net/qq_48082548/article/details/128615957


