本篇内容主要讲解“SpringBoot2整合Redis实现读写操作的方法”,感兴趣的朋友不妨来看看。本文介绍的方法操作简单快捷,实用性强。下面就让小编来带大家学习“SpringBoot2整合Redis实现读写操作的方法”吧!
目录
启动 Redis Server
工程实例
1 工程目录
2 pom.xml
3 Java 源文件
测试
问题
1. 启动 Redis Server
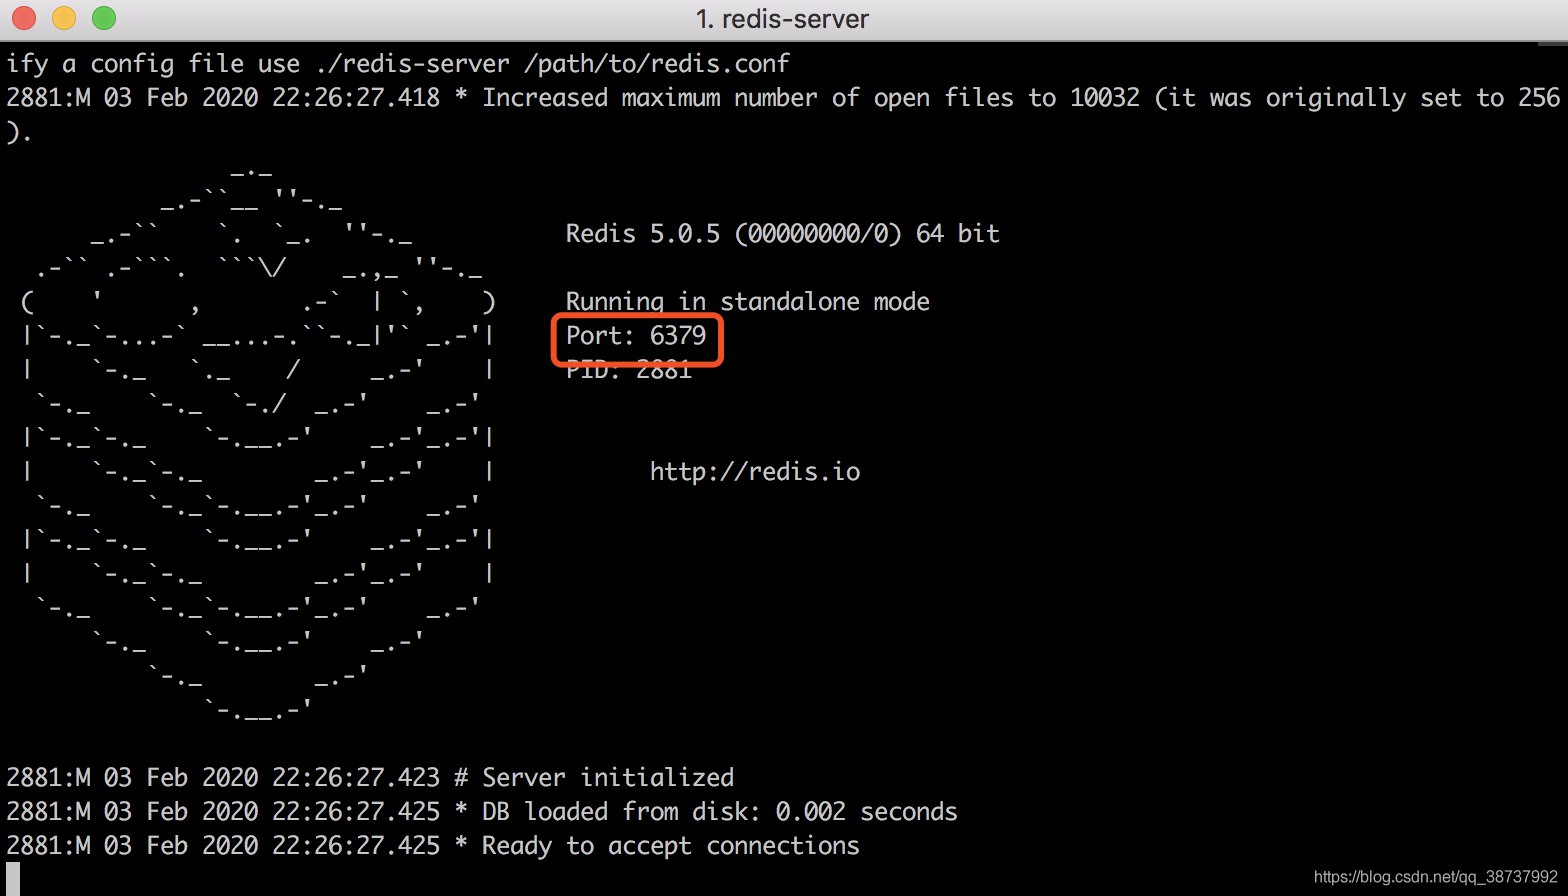
启动 redis server,如下图所示,端口号 6379:

2. 工程实例
2.1 工程目录
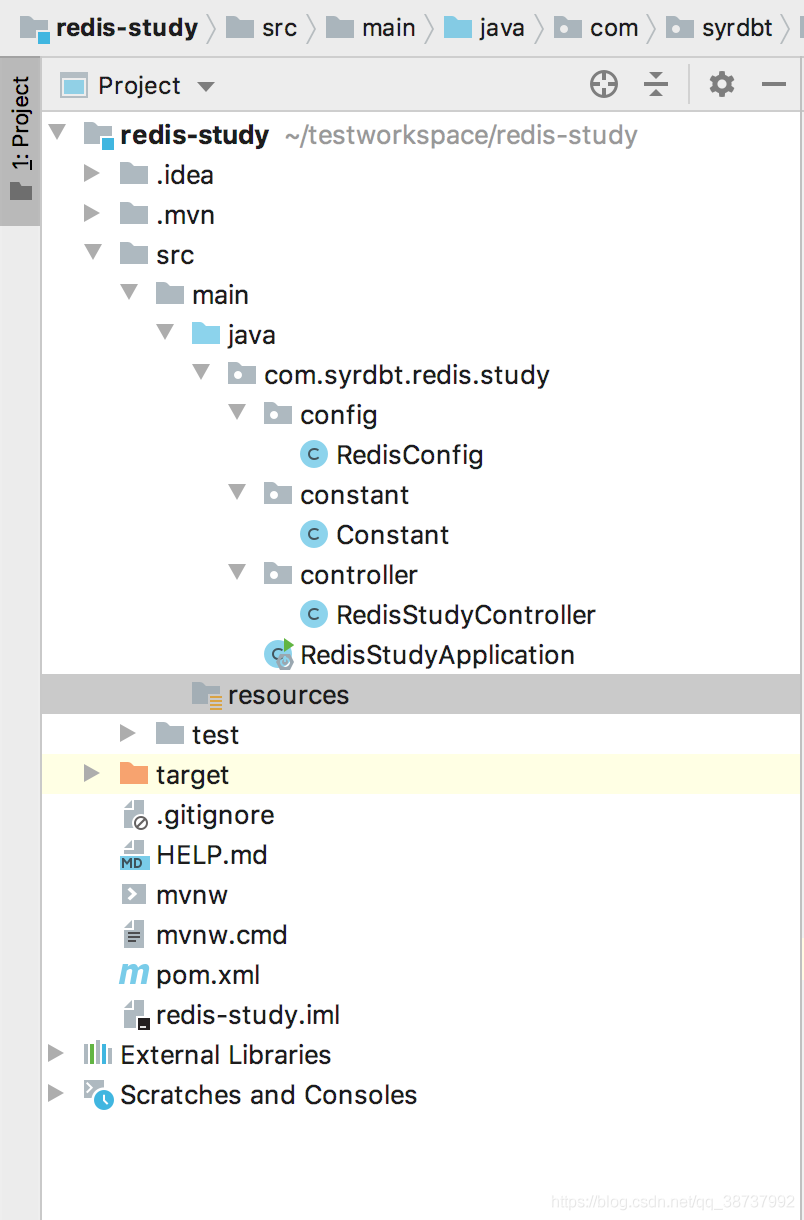
工程目录如下图所示:

2.2 pom.xml
引入依赖:
<dependency> <groupId>org.springframework.boot</groupId> <artifactId>spring-boot-starter-data-redis</artifactId> </dependency> <dependency> <groupId>org.apache.commons</groupId> <artifactId>commons-pool2</artifactId> </dependency>完整 pom.xml 如下所示:
<?xml version="1.0" encoding="UTF-8"?><project xmlns="http://maven.apache.org/POM/4.0.0" xmlns:xsi="http://www.w3.org/2001/XMLSchema-instance" xsi:schemaLocation="http://maven.apache.org/POM/4.0.0 https://maven.apache.org/xsd/maven-4.0.0.xsd"> <modelVersion>4.0.0</modelVersion> <parent> <groupId>org.springframework.boot</groupId> <artifactId>spring-boot-starter-parent</artifactId> <version>2.2.2.RELEASE</version> <relativePath/> <!-- lookup parent from repository --> </parent> <groupId>com.syrdbt</groupId> <artifactId>redis-study</artifactId> <version>0.0.1-SNAPSHOT</version> <name>redis-study</name> <description>Demo project for Spring Boot</description> <properties> <java.version>1.8</java.version> </properties> <dependencies> <dependency> <groupId>org.springframework.boot</groupId> <artifactId>spring-boot-starter-data-redis</artifactId> </dependency> <dependency> <groupId>org.apache.commons</groupId> <artifactId>commons-pool2</artifactId> </dependency> <dependency> <groupId>org.springframework.boot</groupId> <artifactId>spring-boot-starter-web</artifactId> </dependency> <dependency> <groupId>org.springframework.boot</groupId> <artifactId>spring-boot-starter-test</artifactId> <scope>test</scope> <exclusions> <exclusion> <groupId>org.junit.vintage</groupId> <artifactId>junit-vintage-engine</artifactId> </exclusion> </exclusions> </dependency> </dependencies> <build> <plugins> <plugin> <groupId>org.springframework.boot</groupId> <artifactId>spring-boot-maven-plugin</artifactId> </plugin> </plugins> </build></project>2.3 Java 源文件
启动类,RedisStudyApplication.java:
package com.syrdbt.redis.study;import org.springframework.boot.SpringApplication;import org.springframework.boot.autoconfigure.SpringBootApplication;@SpringBootApplicationpublic class RedisStudyApplication { public static void main(String[] args) { SpringApplication.run(RedisStudyApplication.class, args); }}控制器,RedisStudyController.java:
这里使用 SpringBoot 内置的与 Redis 的工具类:RedisTemplate;
除了 RedisTemplate,SpringBoot 还内置了 StringRedisTemplate ;
StringRedisTemplate 只能对 key=String,value=String 的键值对进行操作,RedisTemplate 可以对任何类型的 key-value 键值对操作;StringRedisTemplate 继承了 RedisTemplate。
package com.syrdbt.redis.study.controller;import com.sun.tools.javac.code.Attribute;import com.syrdbt.redis.study.constant.Constant;import org.springframework.beans.factory.annotation.Autowired;import org.springframework.data.redis.core.RedisTemplate;import org.springframework.web.bind.annotation.GetMapping;import org.springframework.web.bind.annotation.RequestParam;import org.springframework.web.bind.annotation.RestController;import java.io.Console;@RestControllerpublic class RedisStudyController { @Autowired private RedisTemplate redisTemplate; @GetMapping("/redis/get") public String visitStringByKey(@RequestParam String key) { return (String) redisTemplate.opsForValue().get(Constant.NAMESPACE + ":" + key); } @GetMapping("/redis/set") public String visitStringByKey(@RequestParam String key, @RequestParam String value) { try { redisTemplate.opsForValue().set(Constant.NAMESPACE + ":" + key, value); } catch (Exception e) { return "error"; } return "success"; }}redis 配置类,RedisConfig.java :
package com.syrdbt.redis.study.config;import org.springframework.beans.factory.annotation.Autowired;import org.springframework.context.annotation.Bean;import org.springframework.context.annotation.Configuration;import org.springframework.data.redis.core.RedisTemplate;import org.springframework.data.redis.serializer.GenericToStringSerializer;import org.springframework.data.redis.serializer.RedisSerializer;import org.springframework.data.redis.serializer.StringRedisSerializer;@Configurationpublic class RedisConfig { private final RedisTemplate redisTemplate; @Autowired public RedisConfig(RedisTemplate redisTemplate) { this.redisTemplate = redisTemplate; } @Bean @SuppressWarnings("unchecked") public RedisTemplate<String, Object> redisTemplate() { RedisSerializer<String> stringSerializer = new StringRedisSerializer(); RedisSerializer<Object> jsonString = new GenericToStringSerializer<>(Object.class); redisTemplate.setKeySerializer(stringSerializer); redisTemplate.setValueSerializer(jsonString); redisTemplate.setHashKeySerializer(stringSerializer); redisTemplate.setHashValueSerializer(jsonString); return redisTemplate; }}常量类用作 redis key 的前缀,Constant.java:
package com.syrdbt.redis.study.constant;public class Constant { public static final String NAMESPACE = "REDIS-STUDY";}3. 测试
写操作,访问 http://localhost:8080/redis/set?key=name&value=syrdbt 。

读操作,访问http://localhost:8080/redis/get?key=name

4. 问题
整合 redis 的写入和读出的实例已经完成了。
不过还有 2 个问题:
我没并没有设置主机号、端口号、用户名、密码就访问了 redis,显然 SpringBoot 默认配置了这些,我本机的redis下载之后没有修改密码等配置,所以才可以访问。
正常境况下,不应该直接使用 redisTmplate,应该封装成工具类,这样方便大家使用。
到此,相信大家对“SpringBoot2整合Redis实现读写操作的方法”有了更深的了解,不妨来实际操作一番吧!这里是编程网网站,更多相关内容可以进入相关频道进行查询,关注我们,继续学习!


