PHP和Nginx应用统一安装在/application下。
Nginx选用了较新的版本1.25.0
官网下载安装包,解包。执行如下命令编译:
./configure --prefix=/application/nginx-1.25.0 --user=nginx --group=nginx --with-http_ssl_module --with-http_stub_status_module --add-module=/application/headers-more-nginx-module-0.34
这里nginx用了一个扩展模块,使用add-module添加。
编译完成后执行如下命令完成安装。
make && make install
完成编译安装需要gcc支持,如果没有,使用如下命令安装。
yum install gcc -y
配置好配置文件然后启动服务。
可以直接使用sbin下的nginx命令启动服务。这里使用了一个启动脚本来启动服务。
如下:
#! /bin/sh
### BEGIN INIT INFO
# Provides: nginx
# Required-Start: $all
# Required-Stop: $all
# Default-Start: 2 3 4 5
# Default-Stop: 0 1 6
# Short-Description: starts the nginx web server
# Description: starts nginx using start-stop-daemon
### END INIT INFO
#PATH=/usr/local/sbin:/usr/local/bin:/usr/sbin:/usr/bin:/sbin:/bin
DAEMON=/application/nginx/sbin/nginx
DAEMON_OPTS='-c /application/nginx/conf/nginx.conf'
NAME=nginx
DESC=nginx
test -x $DAEMON || exit 0
# Include nginx defaults if available
#if [ -f /etc/default/nginx ] ; then
# . /etc/default/nginx
#fi
set -e
case "$1" in
start)
echo -n "Starting $DESC: "
#start-stop-daemon --start --quiet --pidfile /var/run/nginx.pid --exec $DAEMON -- $DAEMON_OPTS
$DAEMON
echo "$NAME."
;;
stop)
echo -n "Stopping $DESC: "
#start-stop-daemon --stop --quiet --pidfile /var/run/nginx.pid --exec $DAEMON
$DAEMON -s stop
echo "$NAME."
;;
restart|force-reload)
echo -n "Restarting $DESC: "
#start-stop-daemon --stop --quiet --pidfile /var/run/nginx.pid --exec $DAEMON
$DAEMON -s stop
sleep 1
#start-stop-daemon --start --quiet --pidfile /var/run/nginx.pid --exec $DAEMON -- $DAEMON_OPTS
$DAEMON
echo "$NAME."
;;
reload)
echo -n "Reloading $DESC configuration: "
#start-stop-daemon --stop --signal HUP --quiet --pidfile /var/run/nginx.pid \
# --exec $DAEMON
$DAEMON -s reload
echo "$NAME."
;;
status)
echo "nginx processing total:"
ps aux |grep "nginx" |grep -v "grep" |grep -v "status"|wc -l
echo
;;
configtest)
$DAEMON -t $DAEMON_OPTS
;;
*)
N=/etc/init.d/$NAME
echo "Usage: $N {start|stop|restart|configtest|force-reload}" >&2
exit 1
;;
esac
exit 0
下面安装PHP。版本安装了2个7.1.33和8.0.27
安装过程基本一致,下面是安装7.1.33的步骤。
官网下载安装包并解包。
执行如下编译命令:
./configure --prefix=/application/php-7.1.33 --enable-zip --with-libzip --enable-mysqlnd --with-mysqli=mysqlnd --with-pdo-mysql=mysqlnd --with-iconv-dir=/usr/local/libiconv --with-freetype-dir --with-jpeg-dir --with-png-dir --with-zlib --with-libxml-dir=/usr --enable-xml --disable-rpath --enable-bcmath --enable-shmop --enable-sysvsem --enable-inline-optimization --with-curl --enable-mbregex --enable-fpm --enable-mbstring --with-mcrypt --with-gd --enable-gd-native-ttf --with-openssl --with-mhash --enable-pcntl --enable-sockets --with-xmlrpc --enable-soap --enable-short-tags --enable-static --with-xsl --with-fpm-user=www --with-fpm-group=www --enable-ftp --enable-opcache=no
此时可能报错。主要原因是缺少依赖包支持。下面是部分报错信息:
错误信息1

执行如下命令,检查已经安装的包和可安装的包。
rpm -qa | grep libjpeg
yum list | grep libjpeg
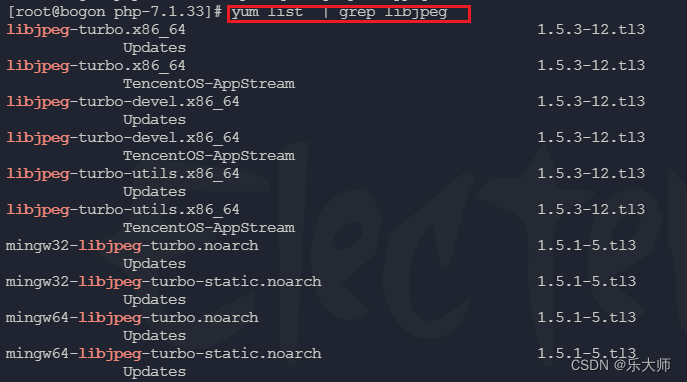
安装依赖包命令如下:
yum -y install libjpeg-devel

错误信息2

执行如下命令,检查已经安装的包和可安装的包。
rpm -qa | grep libjpeg
yum list | grep libjpeg

安装依赖包命令如下:
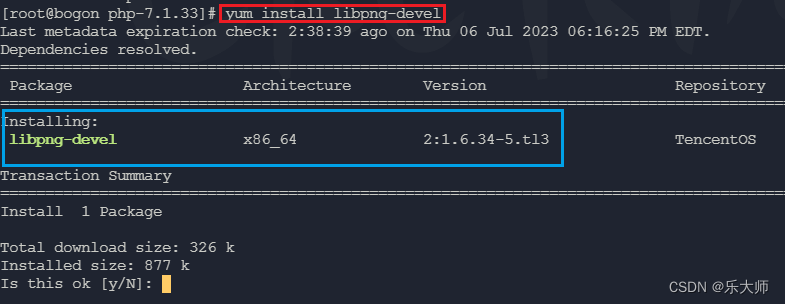
yum install libpng-devel
错误信息3

执行如下命令,检查已经安装的包和可安装的包。
rpm -qa |grep freetype
yum list |grep freetype

安装依赖包命令如下:
yum install freetype-devel

错误信息4

安装依赖包命令如下:
yum install libmcrypt*
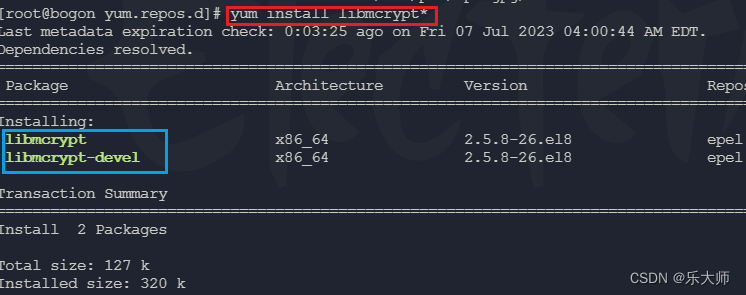
这个依赖包需要epel源,如果没有,清线安装epel源。
可以使用如下命令:
yum install epel-release
我这里简单粗暴复制了一个epel源文件过来,然后清理缓存再生成缓存。
yum clean all && yum makecache
错误信息5
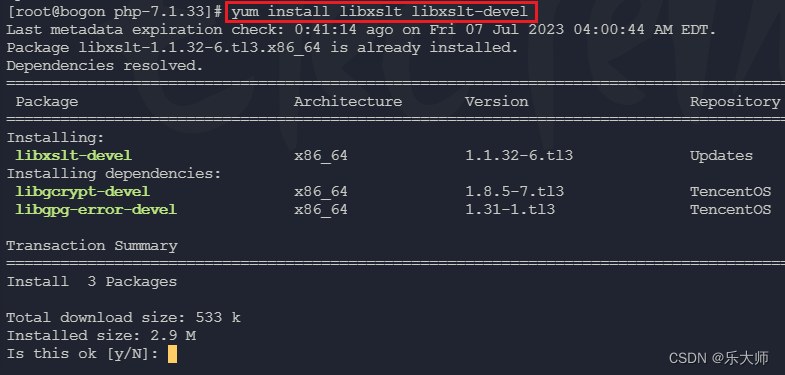
configure: error: xslt-config not found. Please reinstall the libxslt >= 1.1.0 distribution
安装依赖命令如下:
yum install libxslt libxslt-devel
错误信息6

安装依赖包命令如下:
yum install libzip libzip-devel
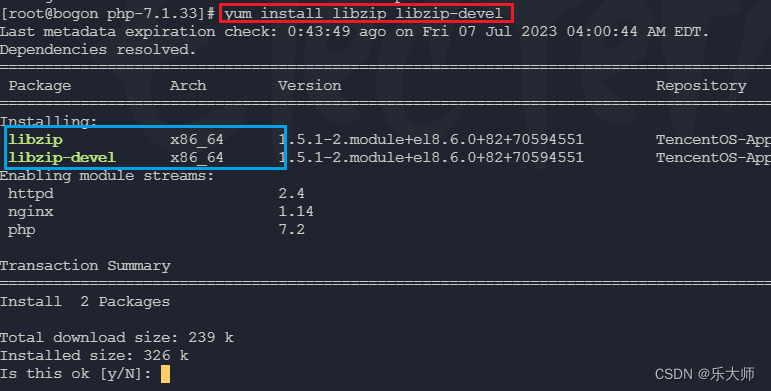
编译php成功后执行make && make install完成安装
php配置文件有4个。分别是etc/pear.conf,etc/php-fpm.conf, etc/php-fpm.d/www.conf,lib/php.ini
php源文件目录下,复制启动脚本,并给与执行权限:
cp sapi/fpm/init.d.php-fpm /etc/init.d/php-fpm
chmod +x /etc/init.d/php-fpm
启动服务:
/etc/init.d/php-fpm start
php8安装基本一致,因为一个服务期内有2个版本,所以注意修改不同的安装目录和端口号。
etc/php-fpm.d/www.conf文件中listen选项就是定义绑定地址和端口号的
php扩展安装
下载redis扩展包,然后解包。
以php7.1.33安装扩展为例
在redis扩展安装包目录内:
/application/php-7.1.33/bin/phpize
./configure --with-php-config=/application/php-7.1.33/bin/php-config
make && make install
完成后会提示一个路径,该路径就是redis.so文件所在位置。
修改php.ini,增加如下一行:
extension=/application/php-7.1.33/lib/php/extensions/no-debug-non-zts-20160303/redis.so
保存退出。重启php-fpm服务即可。
redis服务安装,使用yum最方便
yum install redis
redis配置文件在/etc下,redis.conf
注意绑定IP,修改端口以及设置认证选项
来源地址:https://blog.csdn.net/bigwood99/article/details/131637943


